Showing posts with label DIY. Show all posts

Tuesday

Halloween Party Treats & Tips: Mummy Dogs On The Go!

My kids had their homeschool co-op Halloween party yesterday and there were some super cute treats!

I made Baby Mummy hot dogs. 

I decided to cut the hot dogs in half and make "Baby Mummies" since it was part of a lunch pot luck for kids grades TK to 4th and not the main course. However, we're making them again for our Halloween night dinner and we're leaving them whole and we're adding a slice of Colby Jack cheese before we wrap our mummies. 

These are the ones my husband and kids made with the cheese. He even added bacon to a few of them, and they were great right out of the oven. He cut the dough a bit thicker than I made them. I was really short on time and was making them incredibly fast. I was also dealing with a fussy baby who was eating in his high chair and throwing food on the floor. And I had a huge time crunch to get back before the kids started eating. 


Tips: I used a pizza cutter to slice the dough and I sprayed the cutter with cooking spray so the dough didn't stick. This worked out well. 

I sprayed the baking sheet with cooking spray and I sprayed the tops of the baby mummies too to give it a crispy top. You could also brush the dough with egg whites. 

I made some plain dogs too for the kids with gluten intolerance and I called them "naked mummies" and was met with many giggles. I realize it's hard for a kid to have food allergies, especially during holiday time at school and by calling them "Baby Mummies" and "Naked Mummies" the kids felt like they were included with the festivities and not just getting an after thought. 

I was short on time so I didn't add eyes. But no one seemed to notice. 

Transportation Tips: I realized that I was making a hot dish for a school pot luck and there wasn't a set time for the party, I wanted to keep them warm AND we live 25 minutes away from where the party was being held!!! So this was going to get tricky.


 I lined some glass containers with aluminum foil and placed a layer of mummies, placed another piece of foil and another layer of mummies, then topped it with foil and the seal tight lid. I then placed my containers into an insulated grocery store bag that is lined with a beach towel. 


After I added my containers in the bag I wrapped them with the rest of the towel and zipped it up. I was in the car in less than 10 minutes.

The food was delivered hot and the kids loved them! 


Monday

DIY Mama! No-Sew, Homemade Halloween Costumes Featuring: The ToothFairy!


The Tooth Fairy!

I'm pleased to be able to brag about the fact that I have some really talented friends. For the past several days I've been reading posts and seeing pictures of some super cute homemade Halloween costumes by these creative mama friends of mine so I thought, "Why not feature them on my mom's blog?"

So that is exactly what we are doing!

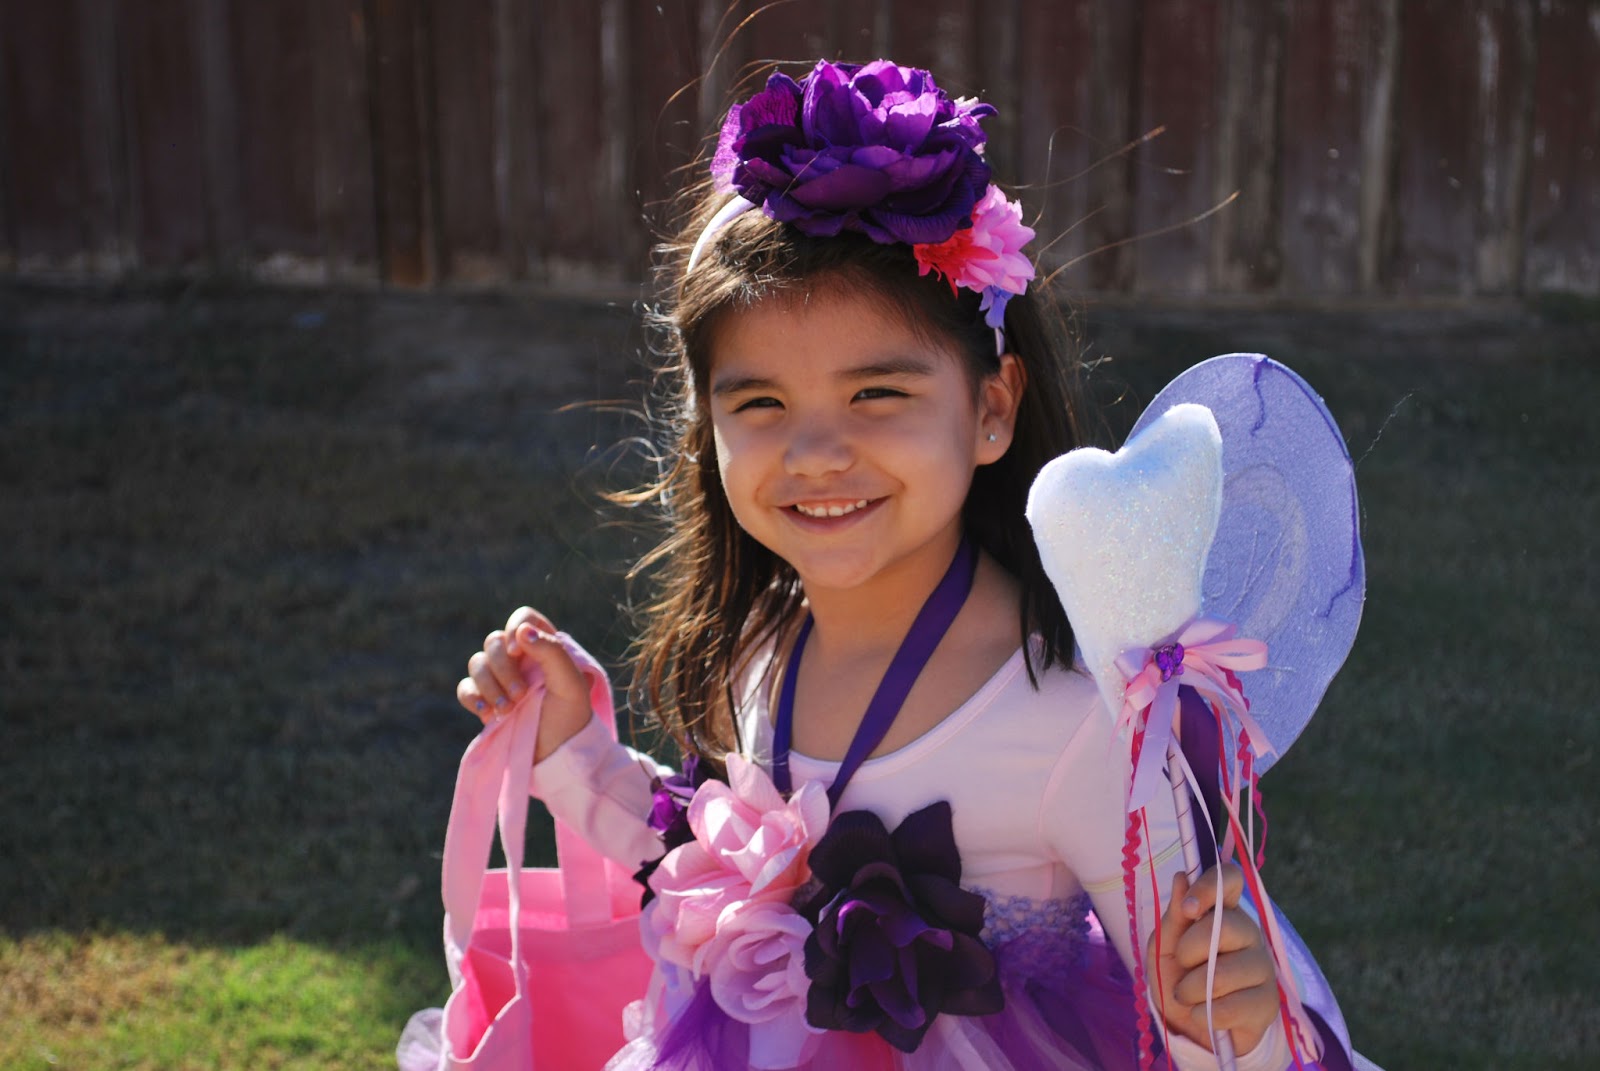
I'm so happy to feature my very talented friend, Karina and her beautiful preschooler, The Tooth Fairy!  Let me just start by saying that the talent pouring out of the women in this family amazes me including our budding artist, lil Miss Tooth Fairy. So it was no shock to me to hear that Mama Tooth Fairy has been busy making her daughter's Halloween costume. I couldn't wait to see it.

Here's Karina's story about how The Tooth Fairy came to be:

"It all started when I asked her last month what she wanted to be for Halloween even though she already had three costumes to choose from.  I bought two princess costumes on sale at Target last year and one of her costumes from last Halloween, a pirate, still fit her.  We go to several different Halloween events throughout the season so she will get to wear all of them at some point.  However, I wanted to make one for her too, so when she said,"The Tooth Fairy," I was sooo happy because I was hoping she would pick a Fairy! I've been dying to make another costume for her like the angel I made for her two years ago. Then when she chose to be a purple and pink Tooth Fairy, I was in heaven!  Right away I knew I wanted to do one of those handmade tulle dresses you find on Etsy that cost an arm and a leg. It can be time consuming, but it's actually quite easy to make. Oh and by the way, I don't own a sewing machine. I just use a hot glue gun - lots and lots of hot glue. You can call me, "Mrs. Hot Glue!"

 This is what you'll need to transform your child into The Tooth Fairy:

  • Tulle. For a four year old you'll need about 4 rolls total. I buy my rolls at Michaels for $2.99 per roll plus you can print up a 40% off coupon online. Bonus! I bought 2 rolls but still needed to order 2 more. The store was very helpful and one week later I had the remaing rolls. I have a closet filled with materials so I already had some tulle in other shades of pink and purple which I used as accents.
  • Ribbon. I bought 5 yards of 3/4 inch ribbon in purple and lilac and 5 yards in 1/4 inch ribbon in light pink. I used ribbon I already had in other colors as accents.
  • "Crochet" headband (Dollar Store. See first pic below.)
  • Flowers....lots and lots of flowers
  • Plain headband
  • 2 squares of white felt fabric (Michaels - $.25 ea)
  • A wooden dowel for the wand
  • Glitter (Michaels - $1)
  • Elmers glue
  • Hot glue sticks. Lots and lots of hot glue sticks...and of course my trusty hot glue gun! Did I mention I don't sew? 
  • Fairy wings (Dollar Store - purchased last year)
  • Plain tote bag for the candy! (Michaels - $3)
  • Long-Sleeved leotard
  • Tights
Getting Started:

The Dress:

There are several helpful videos on YouTube that will give you step-by-step directions on how to make a no-sew tutu, I basically followed the same principle. (See an example of a "no-sew" tutu dress video below.)

First I measured how long I wanted the dress to be and then doubled that measurement to pre-cut all of the tulle I would need. Once the tulle was done, I set it aside and cut a piece of felt fabric to put under the crochet headband where the flowers will be glued on. I wanted to create a smooth surface to hot glue everything as well as have a barrier for my hands so I don't get a million hot glue burns all over my fingers! (Great Tip Karina!) 

Close up of the felt fabric glued to the crochet headband on The Tooth Fairy Dress.


Then I added strips of different colored ribbon to the front and back of the dress. I measured the ribbon the same way I measured the tulle and I tied them to the crochet headband. I tied two long, thicker pieces of ribbon to the front in a "V" shape and secured them with hot glue between the felt and crochet headband. This will be used as a tie around The Tooth Fairy's neck to keep the dress in place.


The top of The Tooth Fairy Dress.


I really liked the idea of having a lot of flowers on the front of the dress so I hot glued 5 big flowers on the top instead of just one. 


Close up of the flowers on The Tooth Fairy Dress.


And after I worked my hot glue magic, the dress was finished!

The completed Tooth Fairy Dress! Ta-Da!


That's it for the dress! 


Making The Tooth Fairy's Accessories: 

The Wand: 
Use a template to trace the tooth. (I downloaded an image from google that I was going to print up but my printer ran out of ink so I had to trace it from my computer screen, lol!) Cut four teeth out of the two pieces of white felt. You are going to need two for the wand, one for the tote and one for the wings. 

Take your Elmer's glue and spread a thin layer of glue covering one side of each tooth and then sprinkle them generously with glitter.  Set them aside to dry completely before moving on to the next step.

Take two of the teeth, stack them together and secure them with pins. Glue the edges together leaving an opening between the roots (that's where your wooden dowel will go.) I wanted to stuff my tooth, so I used the remaining felt and cut it into tiny pieces to stuff the tooth. 

Take a piece of ribbon and wrap it around the dowel in a spiral all the way down to the bottom using little dots of hot glue to secure the ends. Then place the dowel inside the opening of the tooth and close it with hot glue.  

Use the left over ribbon to tie on or glue more flair to your wand. See Picture below.


The Tooth Fairy's Magic Wand. "I wish for more candy, please!"


The Tote: 

Take another tooth that you already cut and glittered to use for the candy bag.  I added some glitter tulle that I already had and glued it around the (bottom) perimeter of the tooth. 

Once that is dry, hot glue the glitter tooth to the tote. I added some bows I made from the ribbon as accents and hot glued them to the tooth.


Close up of The Tooth Fairy's Candy Bag Tote.

The Tooth Fairy's Tote Bag. "Trick-Or-Treat!"


The Wings: 

I already had a pair of glittery wings that I bought last year at the Dollar Store but you can find them at any Halloween store, craft store, discount store, Target, etc. 

Take the final tooth that you cut and glittered and hot glue it to the middle of your wings. I added a little flower accent to the top corner of the tooth with hot glue to make it girly. 


The Tooth Fairy's Wings.


The Headband: 


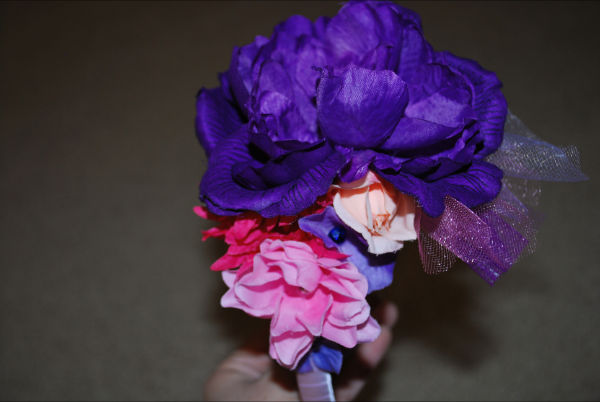
I already had a plain headband in my craft closet, so I covered it with more of the ribbon (see The Wand above for directions) and I hot glued the rest of the flowers in different shades of purple and pink to the top of the headband.  


I also added some bows I made from the left over tulle and ribbon and hot glued them on as accents. 


To finish off the costume I wanted to add a leotard and tights. I bought a long-sleeved, pink leotard at Walmart for $6.00 that she'll also get to use for her ballet class so it was a good investment. I found some purple tights on sale at Target a while ago that will be perfect for her costume as well. Try to use things you already have on hand or items that you can reuse for something else to save money.


Here is a picture of everything you will need to transform your sweet girl into, 

The Tooth Fairy!


The complete Tooth Fairy costume. 


I wanted to do some sort of face painting to finish off The Tooth Fairy costume, so I found this video on YouTube (see below) and it was easy enough 
for me to do. I even found a recipe for a homemade face paint (toxic free), 

but she WON'T let me do it!  :(

...However, there's still time to convince her before Halloween!

Without further adieu, I now present to you


The Tooth Fairy!


*Beautiful photos taken by Karina, (aka Mrs. Hot Glue aka Mama Tooth Fairy!)


As promised, here are the links to the YouTube videos Karina watched to get more information for making a tutu dress out of tulle as well as painting a fairy mask (if your child will let you do it! LOL!)  Both are really informative videos. However, for some reason I'm having a bit of trouble attaching them so I will provide a link to them as well. (If they look blank, try mousing over them for them to pop up.) Please let me know if they do not work via comment and I will try them again. Thank you.

*Originally posted 10/23/12 All Rights Reserved - CocoCana MyTalesFromTheCrib


EDIT: The original poster for the face painting video has removed their video off YouTube. I'm sorry for the inconvenience. 


Here is the link to the tutu dress video.


I'd love to hear from you! Was this helpful?  What do your kids want to be for Halloween? Please share below in the comments section.

Want more No-Sew, DIY Halloween Costumes?  
Click here to see Rainbow Brite!

Have a fun, safe & Happy Halloween!


*heart*
Coco Cana


To follow me on Pinterest click here. 


This post was shared on the following blogs:

Brilliant blog posts on HonestMum.com

Saturday

DIY Mama! No-Sew, Homemade Halloween Costumes Featuring: Rainbow Brite!

Remember Rainbow Brite from the 80's?  Me too!  She was Rad!  I loved how colorful and happy she was. She just brings a smile to your face every time you see her. Well, so does our next lil sweetheart, Miss Rainbow Brite made by DIY Mama, Allison.  She made her daughter's Rainbow Brite costume in a snap!


This was little sister's costume. Their Aunt made Sprite from a pattern she found online.


Total time: 30 mins
Total cost : under $20


Here are Allison's DIY costume instructions for Rainbow Brite:


Royal blue shirt (found at the thrift store.)


Two pairs of rainbow leg warmers one pair for her legs and a pair for her arms (bought online)

Tutu (I was going to use any color I found, but I was lucky enough to find this royal blue one at the thrift store for $2!)

Brite red shoes-(see what I did there?) - (Rainbow Brite can be seen wearing red or yellow shoes so take your pick. I didn't have any, so I found an old pair of sandals in our garage and painted them with some acrylic paint we had on hand. I think they turned out great!)

Red felt for the belt and suspenders (found this at JoAnn's Fabric Store but you can find it at any craft store.)


Wooden rainbow for her belt (found this at Michael's craft store already painted.)

Wooden star for her hair clip (found this at Michael's craft store. This came unpainted.)

Hair clips with yellow hair pieces and yellow ribbon attached  (found at the 99 cent store.)

Rainbow sticker for the cheek  (found at Party City, or you can paint one on if you're feeling artsy!)

Leggings or tights (Use whatever color you have at home since they will be mostly covered up with the rainbow leg warmers.)

*Allison Castellanos, mommy-of-two and owner of Allison Tutoring said, she was on a time crunch so she did not measure anything, she just made some fabric cuts however she thought it would look cute. She used the hot glue gun to add the rainbow to the belt, and the wooden painted start to a hair clip. She also hot glued the belt and suspenders to the t-shirt. 

Super simple and super cute!

Have you made your own Halloween costumes? What have you made? What are your kids going to be this year?  Let us know in the comments section below! 


Want more No-Sew, DIY Halloween Costumes?  

Have a fun, safe & Happy Halloween!


*heart*
Coco Cana


Friday

DIY Mama: Sea Turtle "Honu" Birthday Party & Children's Party Planning Tips!

When my son turned 2 we threw him a sea turtle themed birthday party. Of course since our family lived on Kauai for a few years we can't call sea turtles anything but Honu. When our lil guy was taking swimming lessons we'd say, "Swim Baby Honu, Swim!" (We still say that actually, haha.) So when I saw the most adorable Sea Turtle party decorations at a party store I knew I had to get them!  It's a good thing he was still technically a year old when I was shopping for party stuff and he didn't have a set opinion on them. That all changes at 3. 

Here are some of our simple ideas for the party:


This pattern also had alternative napkins and some decorations that said "Baby's 1st Birthday!"  I usually buy one pack of plates in each size of the birthday pattern and then plain colored plates in the party color theme at a party or discount store. I make sure all of the children have a party theme plate. They are the one who notice those kinds of things. All of the dads, grandpa's and your own husband/sig other would be happy just eating off of their hands or putting food directly on the table. They could care less what the plate looks like. So don't feel the need to pay extra for every single plate to be in the birthday pattern. I got plain cups and added some Honu stickers on each cup (which for some reason none of the stickers are showing in this pic!  LOL!) We also had a sharpie marker and wrote each child's name on the cups.
Photo wall for the birthday boy and guests. 
I made the "banner" myself out of construction paper. I traced the letters of his name with a stencil and added some Honu stickers that I bought with the decorations. I love buying the stickers that come in the pattern of the decorations. You can use them for so many things!  The "banner" isn't even strung together. I just taped them close together. I bought the Honu picture and the palm tree at the Dollar Store (they are seasonal items.)  I made the tissue pom poms myself. The woody is a one-of-a-kind item though. My mother-in-law is a talented artist and she painted that for his bedroom. We have a surfer/beach/honu theme in his room as well.

You can move the girl off the island...

Anyway, so my MIL found a woody and took a picture of it and painted it on that thick foam poster board and then used a razor to cut around it. She was like, "it was no big deal. Just an easy little art project."  Right!  I'll leave it up to the experts. But it was a big hit for our guest picture wall and now it hangs in his room. We think it's awesome!

We booked the party room at an indoor play place and they had a king's chair for the birthday kid. It was HUGE! You can't really see the sign I made but it has my son's name and the #2 as well as some more Honu stickers. We got some star balloons in the green and blue party theme and then big sister choose the other two. She was so excited that she got to choose two of his balloons. We get them at the dollar store for $1.00 each. It's a cheap way to get a bunch of balloons!  Cheap works for me! 
Absolutely adorable craft idea I found online by talented author and artist Tammy Yee. 
Living on Kauai we saw her beautiful children's books all the time and read many of them when our daughter was a baby.  Here is the direct link to the Honu craft. She also makes a beautiful paper bag owl craft which we made for my daughter's 5th birthday party. It was a nature party with a nature hike and these two paper bag puppets were a great addition to our other nature themed crafts. Our guests raved about them at both parties. I followed along with her simple instructions on the link to the craft. 

We wrote this on the back of each paper bag so they were sure to go home with the right mommy or daddy who adopted them. 
Even the parents wanted to color!

Because we were at an indoor play place with a million things to do the little ones were way too busy to color during the party, so they finished them at home.
Plus most of them were just barely 2 years old so they didn't sit for too long!  That is why I only had this one simple craft and no games or piñata. The venue provided enough entertainment.  


Grammy baked and decorated all of the super yummy, homemade vanilla and chocolate cupcakes and the "Big Boy Cake" too, as our lil guy was calling it. For other parties I have made my own cupcake toppers but I couldn't resist buying these lil guys. They were just TOO cute!  

Next time I set up a photo op wall I'll be sure to stage the kids in front of it first so I can make space for all of the decorations. However, if you have ever booked a party room at a children's location you know your time is very limited and all of my elves were working fast to set things up and get the party rolling behind the scenes so the kids didn't feel too rushed. We ended up booking an extra 2 hours which sounds very expensive but it actually wasn't. We technically only had the party room for 2 hours (we eeked it out a bit though, it wasn't very busy that day) and we booked the total play time for 4 hours. It ended up only costing us an extra $2.00/$3.00 per child for the extra 2 hours of play time!  Crazy, right? I'm glad I asked about it and we were so glad we made that decision. This gave people a cushion if they were running late for the party (which parents with toddlers ALWAYS are - we are anyway) and we didn't want to feel rushed during the actually party time which is only 2 hours. How are you expected to play at the place and then have a birthday party with food and cake, games, etc. in only 2 hours? And we wonder why so many people have ADD!)
This way no one felt rushed and the kids had plenty of time to play before and after the actual party portion of the event and most of our guests stayed for about 3 1/2 hours or so and we were ready to go. It worked out well if you can fit it into the party budget. I put a few refueling snacks like raisins, juice and crackers in the goodie bag so there weren't too many tantrums in the car ride on the way home. 
Someone had been playing dress up and was refusing to let me see her face for the picture!   ;-)

Thank you for coming to our party!

Our simple lil Honu birthday party for our Baby Honu turned out super cute and a lot of fun for the kids!  

Kids Party Tips:
I'm a firm believer in keeping parties small and only inviting the kids your child sees often and enjoys playing with. This takes a lot of restraint on the parents part. Mainly mama. When the babies are a year old you can get away with inviting everyone on your list (all of the family members, friends and adults who don't have kids as well as all of your friends with kids all various ages.) When your child gets older 2 and 3 and above you should really try to stick to close relatives (grandparents and close cousins) and children your child already knows as well as kids in a similar age bracket (unless they are the sibling of your child's friend.)  For very little children I recommend sticking to a 2 year age bracket if possible. This usually means for a 2 year old it's ok to go up to 4 years old. An 8 year old will be totally bored at a party for a 3 year old regardless if it's your very best friend or not. And trust me, they will want and expect to be entertained!  Not kiddie games either. The difference of only 1 year even can make a HUGE difference with a group of very young kids playing together. This is good to keep in mind when you are planning to have age appropriate games (geared for the birthday child) and a piñata, etc.  A 5 year old will dominate everything at a 2 year olds party (and probably knock kids down as well) and it won't be fair for either child. Don't put children in this situation and then expect them to be perfect angels. It will end in tears.

Unfortunately, we went to a party once where my child no longer 'knew' the birthday child because it had been so long since they had seen each other (even though they played a lot as babies) and without going into detail, it didn't really go well because we were the only ones the birthday child didn't know really well. So it was crazy awkward for everyone. It wasn't their fault, they were just a child, but I should've listened to my gut when I was having doubts about going. 

The hard thing about that is that (thanks to Facebook) every single person who is a friend of yours with a child will expect to be invited to your child's party. This doesn't mean you should invite them. Less is better - for you and especially for the birthday child.  Birthday parties for children are overwhelming because there is a lot going on, it's usually a sugar free-for-all and it's total party overload so try to think of ways to make it easier for them. 

Hectic isn't fun. 

And having to stop playing with kids you do know to come over and give hello/goodbye hugs to kids you don't even know or don't remember isn't fun either (even though you've known the parents for a million years and you have pictures of the tow of them hugging and playing. They don't remember it. Invite them to YOUR party!) 

However, there is always going to be the, "I feel obligated to invite (fill in the blank)" maybe even a few - and that doesn't have to be as negative as it sounds. But ask yourself this: Would you invite this person and their child over for a one-on-one playdate with just you and your child?  

If the answer is no then you have your answer for your guest list. 

If you don't quite know how to let your friends know and you plan to share your child's party pics on facebook, etc., then you can blame it on the family budget why you are keeping it small. EVERYONE should be able to relate to that one. If not then I'd like to know your secrets. 

You can then say, "due to our tight family budget we have decided to keep the party very small so we are only inviting the kids we see all the time in his weekly playgroup/swim class, or her best buddies from school, etc."

We are in the process of getting ready for another birthday party around here and we are keeping it even smaller this time. Thanks to Pinterest children's birthday parties have gotten really out of hand lately. It inspired me to write this:


someecards.com - When we were kids you had birthday cake, punch and a few games with friends. Now it feels more like a destination wedding than a kid's birthday party.


Remember, less is more. Children will entertain themselves with a few good buddies and an open space to run, some chalk and some bubbles and toys you usually bring out when friends come over. You don't need to provide them with fabulous entertainment every minute of the party.  There is a saying to keep the guest count the same number as the age of the child. When they are ages 2-4 this can be kind of hard because you might have some really good friends you see weekly at a playgroup or something, but still try to keep it small if possible.  I hate to be harsh, but the total spaz kid who is a tyrant at playgroup becomes 10 times worse when there is sugar, excitement, overstimulation and another child's brand new toys involved. (Which brings me to an important point: Open all gifts after everyone goes home. Parents will understand.)

Remember this motto: Would you invite this person and their child over for a one-on-one playdate with just you and your child?  If the answer is 'no' then you have your answer for your guest list. 

Have fun and party on!  Oh yea, I'm on Pinterest now. I have been pinning ideas for our next birthday party. Can you guess what our theme is going to be?  Check out my Pinterest party board called,


And always you can follow me at twitter too.

Thanks for stopping by.

xo,
Coco Cana


Post Of The Week!

Motherhood: A Poem

back breaking arms aching mind worn out and tired patience gone days are long somedays I wish I could get fired Laundry is piling an ...

Check These Out!