 |
.jpg) |
| The Tooth Fairy! |
I'm pleased to be able to brag about the fact that I have some really talented friends. For the past several days I've been reading posts and seeing pictures of some super cute homemade Halloween costumes by these creative mama friends of mine so I thought, "Why not feature them on my mom's blog?"
So that is exactly what we are doing!
I'm so happy to feature my very talented friend, Karina and her beautiful preschooler, The Tooth Fairy! Let me just start by saying that the talent pouring out of the women in this family amazes me including our budding artist, lil Miss Tooth Fairy. So it was no shock to me to hear that Mama Tooth Fairy has been busy making her daughter's Halloween costume. I couldn't wait to see it.
Here's Karina's story about how The Tooth Fairy came to be:
"It all started when I asked her last month what she wanted to be for Halloween even though she already had three costumes to choose from. I bought two princess costumes on sale at Target last year and one of her costumes from last Halloween, a pirate, still fit her. We go to several different Halloween events throughout the season so she will get to wear all of them at some point. However, I wanted to make one for her too, so when she said,"The Tooth Fairy," I was sooo happy because I was hoping she would pick a Fairy! I've been dying to make another costume for her like the angel I made for her two years ago. Then when she chose to be a purple and pink Tooth Fairy, I was in heaven! Right away I knew I wanted to do one of those handmade tulle dresses you find on Etsy that cost an arm and a leg. It can be time consuming, but it's actually quite easy to make. Oh and by the way, I don't own a sewing machine. I just use a hot glue gun - lots and lots of hot glue. You can call me, "Mrs. Hot Glue!"
This is what you'll need to transform your child into The Tooth Fairy:
- Tulle. For a four year old you'll need about 4 rolls total. I buy my rolls at Michaels for $2.99 per roll plus you can print up a 40% off coupon online. Bonus! I bought 2 rolls but still needed to order 2 more. The store was very helpful and one week later I had the remaing rolls. I have a closet filled with materials so I already had some tulle in other shades of pink and purple which I used as accents.
- Ribbon. I bought 5 yards of 3/4 inch ribbon in purple and lilac and 5 yards in 1/4 inch ribbon in light pink. I used ribbon I already had in other colors as accents.
- "Crochet" headband (Dollar Store. See first pic below.)
- Flowers....lots and lots of flowers
- Plain headband
- 2 squares of white felt fabric (Michaels - $.25 ea)
- A wooden dowel for the wand
- Glitter (Michaels - $1)
- Elmers glue
- Hot glue sticks. Lots and lots of hot glue sticks...and of course my trusty hot glue gun! Did I mention I don't sew?
- Fairy wings (Dollar Store - purchased last year)
- Plain tote bag for the candy! (Michaels - $3)
- Long-Sleeved leotard
- Tights
Getting Started:
The Dress:
There are several helpful videos on YouTube that will give you step-by-step directions on how to make a no-sew tutu, I basically followed the same principle. (See an example of a "no-sew" tutu dress video below.)
First I measured how long I wanted the dress to be and then doubled that measurement to pre-cut all of the tulle I would need. Once the tulle was done, I set it aside and cut a piece of felt fabric to put under the crochet headband where the flowers will be glued on. I wanted to create a smooth surface to hot glue everything as well as have a barrier for my hands so I don't get a million hot glue burns all over my fingers! (Great Tip Karina!)
 |
| Close up of the felt fabric glued to the crochet headband on The Tooth Fairy Dress. |
Then I added strips of different colored ribbon to the front and back of the dress. I measured the ribbon the same way I measured the tulle and I tied them to the crochet headband. I tied two long, thicker pieces of ribbon to the front in a "V" shape and secured them with hot glue between the felt and crochet headband. This will be used as a tie around The Tooth Fairy's neck to keep the dress in place.
 |
| The top of The Tooth Fairy Dress. |
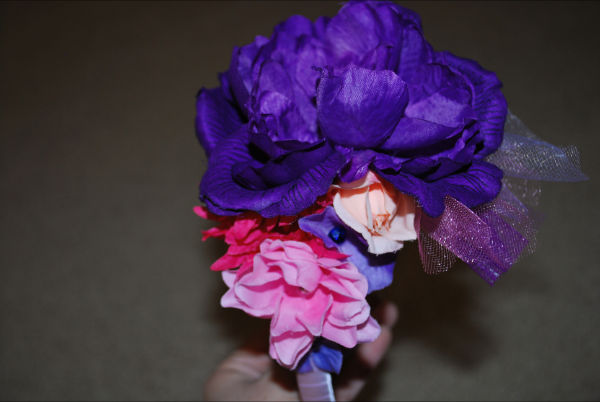
I really liked the idea of having a lot of flowers on the front of the dress so I hot glued 5 big flowers on the top instead of just one.
 |
| Close up of the flowers on The Tooth Fairy Dress. |
And after I worked my hot glue magic, the dress was finished!
 |
| The completed Tooth Fairy Dress! Ta-Da! |
That's it for the dress!
Making The Tooth Fairy's Accessories:
Use a template to trace the tooth. (I downloaded an image from google that I was going to print up but my printer ran out of ink so I had to trace it from my computer screen, lol!) Cut four teeth out of the two pieces of white felt. You are going to need two for the wand, one for the tote and one for the wings.
Take your Elmer's glue and spread a thin layer of glue covering one side of each tooth and then sprinkle them generously with glitter. Set them aside to dry completely before moving on to the next step.
Take two of the teeth, stack them together and secure them with pins. Glue the edges together leaving an opening between the roots (that's where your wooden dowel will go.) I wanted to stuff my tooth, so I used the remaining felt and cut it into tiny pieces to stuff the tooth.
Take a piece of ribbon and wrap it around the dowel in a spiral all the way down to the bottom using little dots of hot glue to secure the ends. Then place the dowel inside the opening of the tooth and close it with hot glue.
Use the left over ribbon to tie on or glue more flair to your wand. See Picture below.
 |
| The Tooth Fairy's Magic Wand. "I wish for more candy, please!" |
The Tote:
Take another tooth that you already cut and glittered to use for the candy bag. I added some glitter tulle that I already had and glued it around the (bottom) perimeter of the tooth.
Once that is dry, hot glue the glitter tooth to the tote. I added some bows I made from the ribbon as accents and hot glued them to the tooth.
 |
| Close up of The Tooth Fairy's Candy Bag Tote. |
 |
| The Tooth Fairy's Tote Bag. "Trick-Or-Treat!" |
I already had a pair of glittery wings that I bought last year at the Dollar Store but you can find them at any Halloween store, craft store, discount store, Target, etc.
Take the final tooth that you cut and glittered and hot glue it to the middle of your wings. I added a little flower accent to the top corner of the tooth with hot glue to make it girly.
 |
| The Tooth Fairy's Wings. |
The Headband:
I already had a plain headband in my craft closet, so I covered it with more of the ribbon (see The Wand above for directions) and I hot glued the rest of the flowers in different shades of purple and pink to the top of the headband.

To finish off the costume I wanted to add a leotard and tights. I bought a long-sleeved, pink leotard at Walmart for $6.00 that she'll also get to use for her ballet class so it was a good investment. I found some purple tights on sale at Target a while ago that will be perfect for her costume as well. Try to use things you already have on hand or items that you can reuse for something else to save money.

Here is a picture of everything you will need to transform your sweet girl into,
The Tooth Fairy!
 |
| The complete Tooth Fairy costume. |
I wanted to do some sort of face painting to finish off The Tooth Fairy costume, so I found this video on YouTube (see below) and it was easy enough for me to do. I even found a recipe for a homemade face paint (toxic free),
but she WON'T let me do it! :(
...However, there's still time to convince her before Halloween!
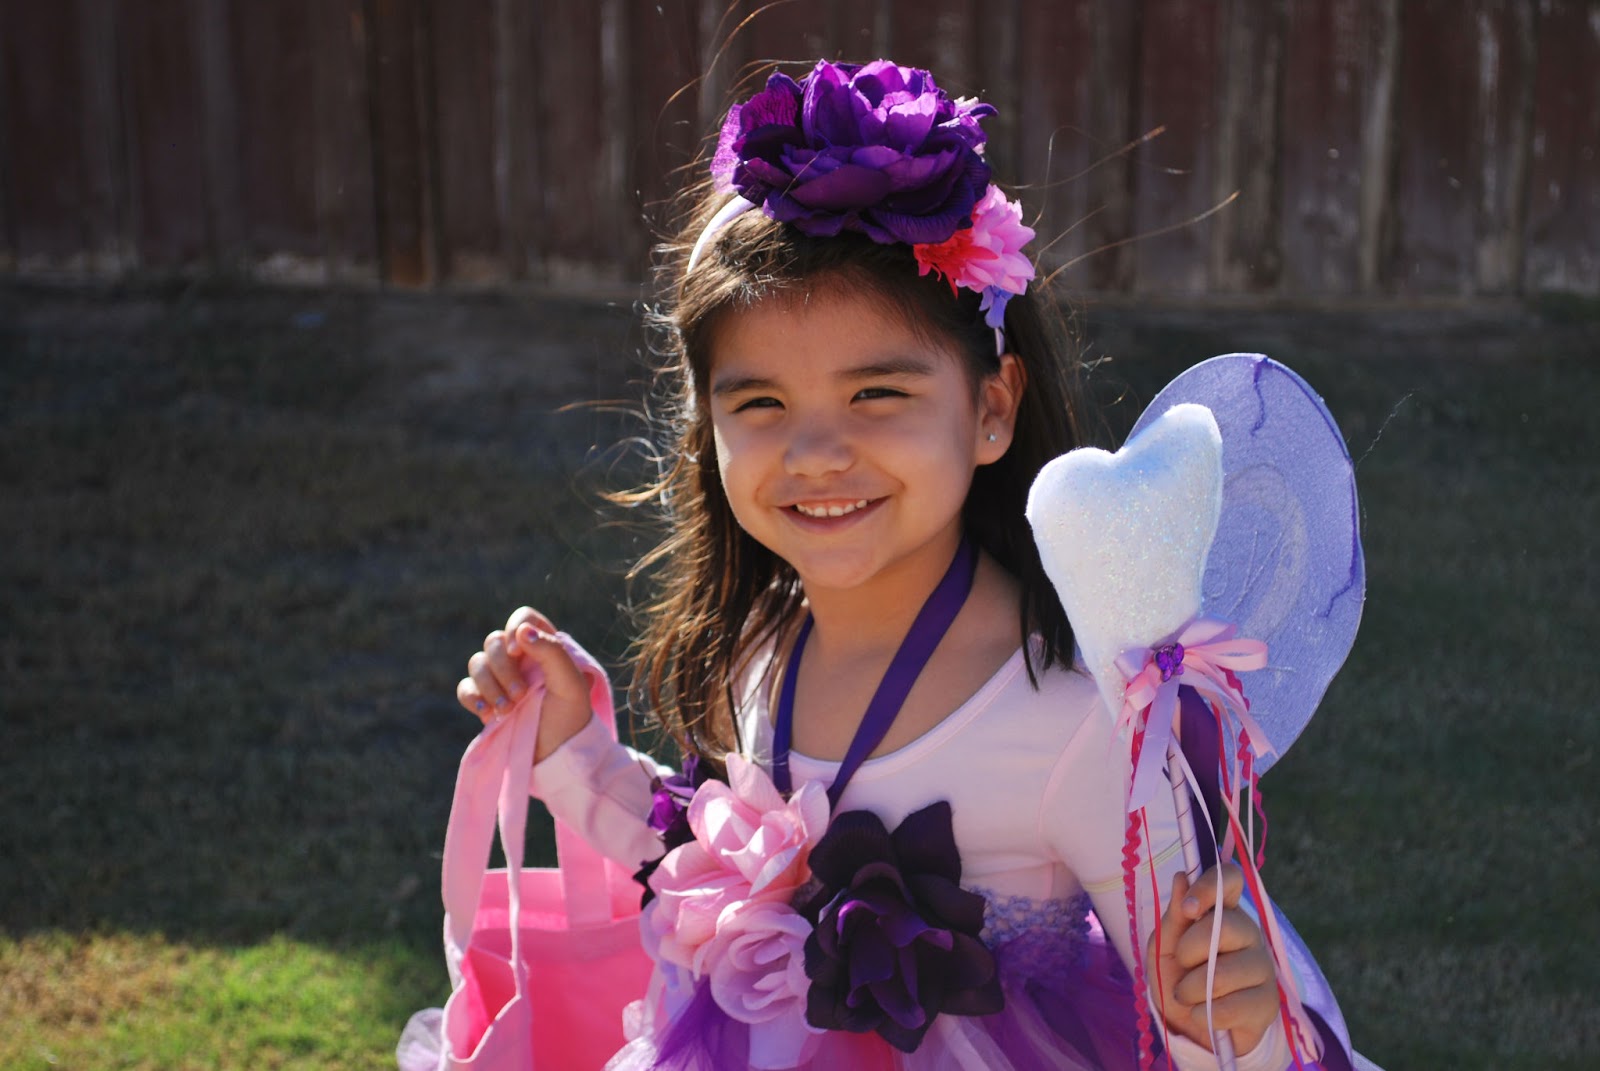
Without further adieu, I now present to you
The Tooth Fairy!

As promised, here are the links to the YouTube videos Karina watched to get more information for making a tutu dress out of tulle as well as painting a fairy mask (if your child will let you do it! LOL!) Both are really informative videos. However, for some reason I'm having a bit of trouble attaching them so I will provide a link to them as well. (If they look blank, try mousing over them for them to pop up.) Please let me know if they do not work via comment and I will try them again. Thank you.
*Originally posted 10/23/12 All Rights Reserved - CocoCana MyTalesFromTheCrib
EDIT: The original poster for the face painting video has removed their video off YouTube. I'm sorry for the inconvenience.
Here is the link to the tutu dress video.
*heart*
Coco Cana

Here is the link to the tutu dress video.
I'd love to hear from you! Was this helpful? What do your kids want to be for Halloween? Please share below in the comments section.
Want more No-Sew, DIY Halloween Costumes?
Click here to see Rainbow Brite!
Want more No-Sew, DIY Halloween Costumes?
Click here to see Rainbow Brite!
Have a fun, safe & Happy Halloween!
*heart*
Coco Cana


Aweee1!! you are so sweet! thank you friend,you did a great job transforming my gibberish into actual words, lol...I tried both videos and they worked!
ReplyDeleteNote: I strongly suggest putting your lil girl into a long sleeve and pants/tights because the tulle is very itchy.
I'm glad you liked it! It was a fun post to do. Thanks for making such a cool costume and for taking such beautiful photos for me to feature!
DeleteWow! That is so beautiful! She looks so adorable in that purple fairy costume. i totally love it! I will surely look forward for this year's halloween costume. Feel free to check out my post for more ideas too, and hopefully they will help.
ReplyDeleteCheers and have fun!
Barbara
Homemade Halloween Costumes
Wow, she looks so adorable and cute on her purple fairy costume! I totally love it! I am looking forward for this year's halloween costume. Feel free to check out my post of different Homemade Halloween Costumes and hopefully they will be of any help for you.
ReplyDeleteCheers and have fun!
Barbara
That is awesome!!!!!!!!! It seems easy but I bet if I tried it out for my little girl I probably wouldn't have much luck!
ReplyDeletex
Wow! this is awesome and she looks adorable too! My little boy will be a superhero captain america as he loves Avengers. Thanks for sharing! #brillblogposts
ReplyDelete